Tools to Use When Setting up a JavaScript Repo

Setting up a JavaScript repo for the first time can be tricky, but it doesn't have to be! This blog will walk you through setting up your first repository, from development environment setup to package bundlers to protecting your main branch.
Setting up the dev environment
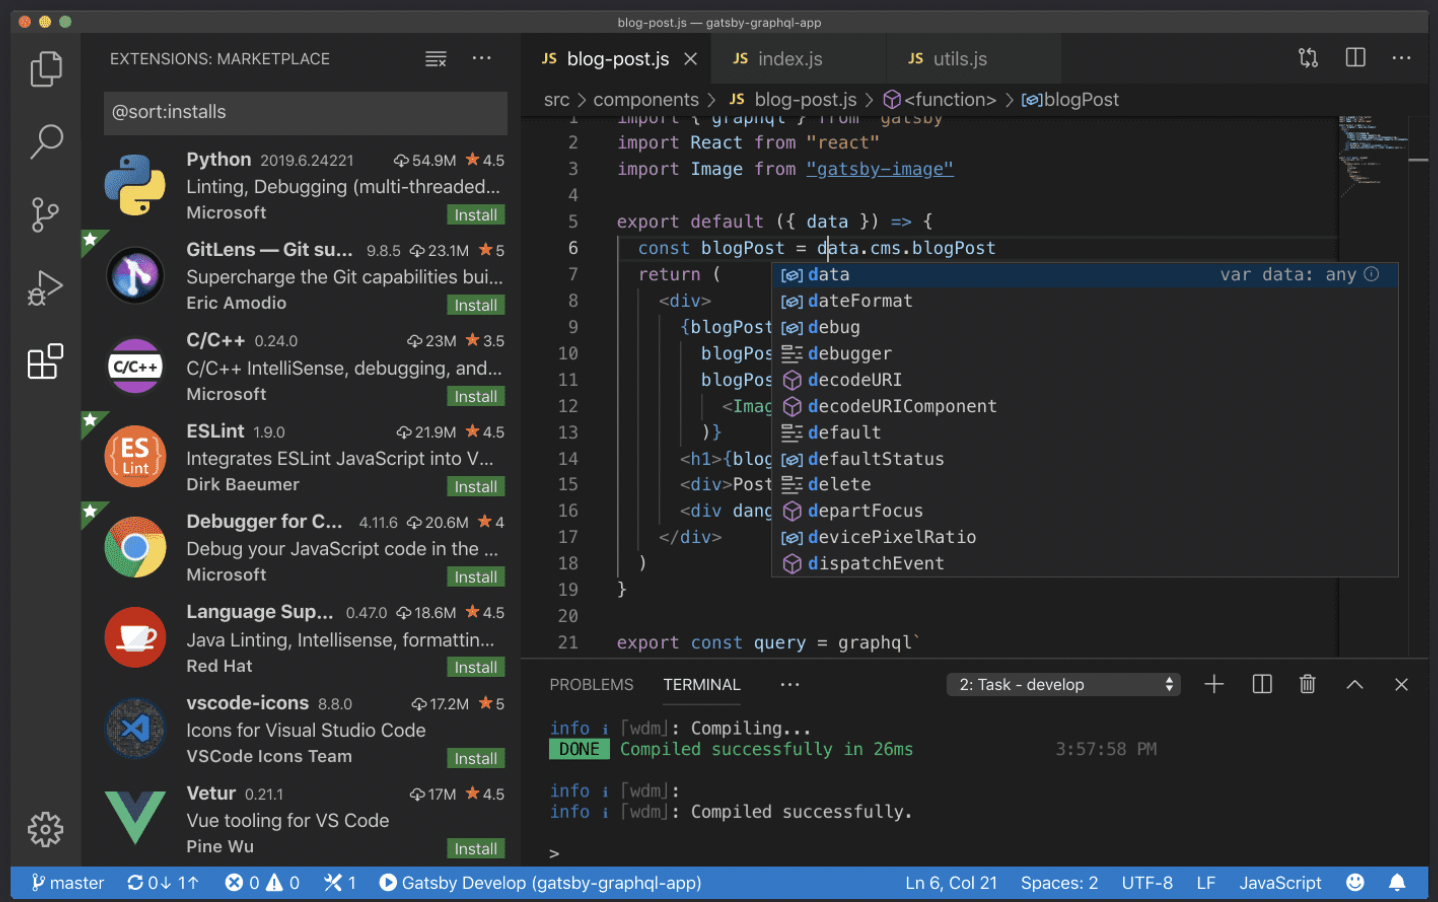
To set up our dev environment, the first thing we will need is a code editor. I recommend using VS Code, but you can use any editor of your choice.
https://cdn.hashnode.com/res/hashnode/image/upload/v1659243277836/DG_oNFj8Z.png
Next, we need a package manager to install and manage dependencies for the project. There are primarily two leading package managers available out there - npm and yarn. The latest addition to this list is the pnpm package manager. You can check out the detailed comparisons in this guide.
Now that the development environment is set up, let's go ahead and start with a simple JavaScript project.
Creating the JavaScript Repo
We will create a simple JS app that will display the current time on the web page.
Open up your terminal and run the below command to create the project folder.
$ mkdir current-time-appNow open the VS code editor with the project folder as the root by running the below command.
$ code current-time-appNow we can start our project with npm by running the following command.
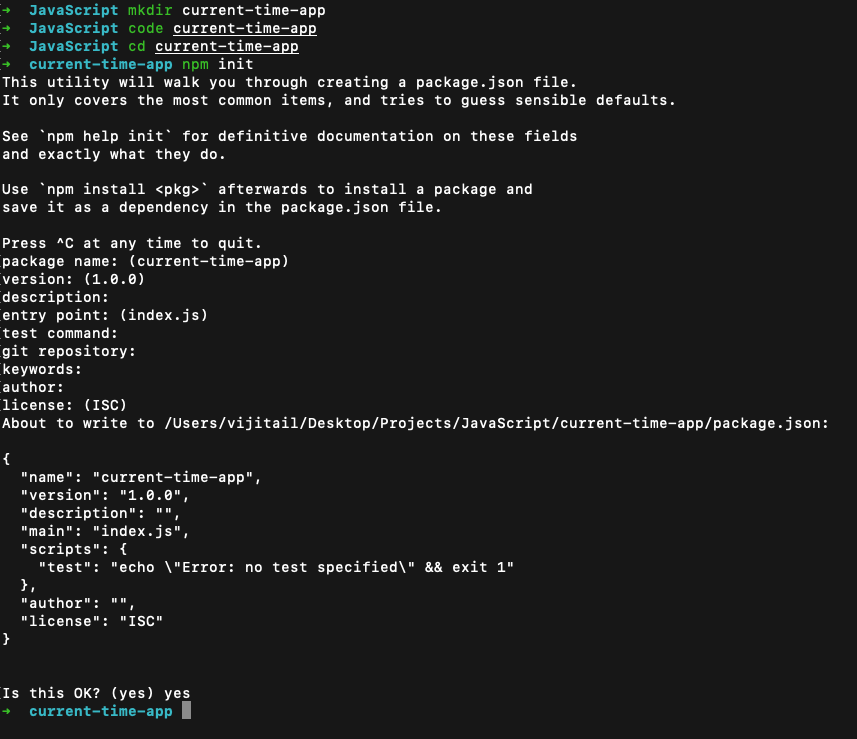
$ npm initThe npm init command is a step-by-step utility to build the scaffolding for your project. It will prompt you with questions about your project, as shown below.
https://paper-attachments.dropbox.com/s_AE8E461A5FA54C422D1B251EFF7DA9380DF4D439578474F21AC919DB5F85E934_1659455611257_image.png
This command created a package.json file in the project root with some metadata. It contains information such as the project's name, description, version number, etc.
If you want to skip all the prompts, you can use the --yes option.
$ npm init --yesInstalling project dependencies
Let's install the required packages for the application. We'll need a package bundler to minify and build our application code.
For this guide, I'll install parcel, an excellent tool for bundling JS web apps.
$ npm i -D parcelThe reason why I chose parcel over other popular bundlers, like webpack, is that parcel comes with a lot of built-in features like hot-reloading, code optimization, etc., with minimal configuration.
Next up, we need to update the package.json file so that parcel knows how to bundle the app. Add a source property that defines the path of the entry file, in this case, it will be the index.html file. We will also include a browserslist property to specify which browsers should be supported by our app.
{
  ...
  "source": "index.html",
  "browserslist": "> 0.5%, last 2 versions, not dead",
  ...
}
Parcel will look at the value passed in the browserslist property and create the bundle compatible with the specified browsers. You can find more details about browserslist and further query options in Browserslist's GitHub repository.
Linting our project
To maintain coding standards and avoid stylistic errors, we need to install a code linter. Currently, ESlint is the most popular linter in the JavaScript ecosystem, so let's install it in our project.
$ npm i -D eslint prettier prettier-eslint prettier-eslint-cliAlong with eslint, we have also installed prettier and eslint-prettier packages. This will help us to automatically format our code and fix linting errors.
To run eslint, we will add the following line in the scripts section of package.json.
"lint": "eslint . --ext .js"To configure eslint execute the lint command, and select the options accordingly as shown below.
$ npm run lint -- --init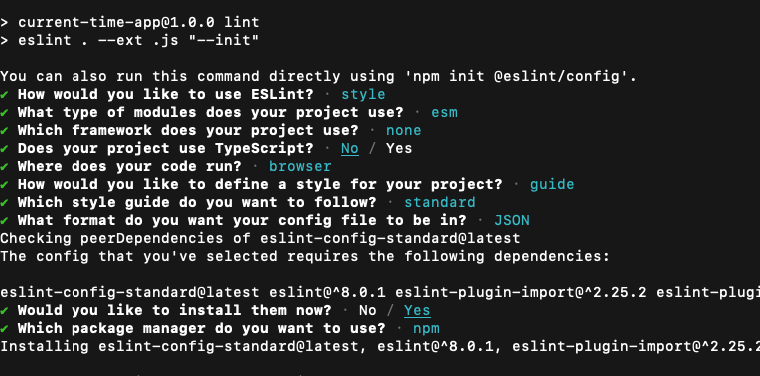
https://paper-attachments.dropbox.com/s_AE8E461A5FA54C422D1B251EFF7DA9380DF4D439578474F21AC919DB5F85E934_1659543187989_image.png
The eslint command will create a .eslintrc.json at the project’s root, which will include the linting configuration.
Next, add the eslint-prettier command in the scripts section to autoformat code and fix the eslint errors.
"format": "prettier-eslint --eslint-config-path=<YOUR_CONFIG_PATH> --write '**/*.js'"In the next section, we can use a pre-commit git hook to ensure that all the eslint errors are fixed before committing the changes. Husky is a popular package that helps in maintaining git hooks without manual intervention.
We will also initialize the git repo, so that we can push our changes to Github.
$ git initLet’s add a .gitignore file to exclude the node_modules and the dist folder from git tracking. You can use gitignore.io tool for generating the .gitignore file.
.png)
And finally, we will run the commit command to do our first commit
git commit -m "initial commit"Now we have the whole scaffold ready to go, let’s do some coding
Pre-commit hooks with Husky
To get started with Husky, execute the following command.
$ npx husky-initThe husky-init command will set up Husky, update the package.json file and creates the default pre-commit hook in the project.
You can update the hook by adding the npm run lint command.
#!/usr/bin/env sh
. "$(dirname -- "$0")/_/husky.sh"

npm run lint
Let’s do some coding!
Create src folder in the project root and add the following JavaScript files.
// src/utils.js
export const getTime = (date = new Date()) => date.toTimeString().slice(0, 8);
// src/index.js
import { getTime } from "./utils";
const timeNode = document.getElementById("time");
const updateTime = () => {
const currentTime = getTime();
timeNode.innerHTML = currentTime;
};
setInterval(updateTime, 1000);In the project root, add the index.html entry file with the following content.
...
  <body>
    <h1 id="time"></h1>

    <script type="module" src="src/index.js"></script>
  </body>
...
Basically in the app, we are updating the current time on the web page every 1 second.
Running the app locally
We will be using parcel for running the dev server in the local environment.
Add the parcel command in the script section as shown below.
...
"scripts": {
    "start": "parcel --open --port=3000",
    ...
},
...
The --open option will open the app on the default web browser of your system. Also, by default, parcel starts the server on port 1234; you can override the port number using the --port option.
Now run the start script on your terminal to get the app started.
$ npm run start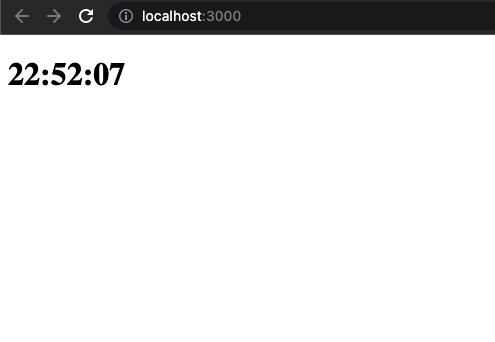
https://paper-attachments.dropbox.com/s_AE8E461A5FA54C422D1B251EFF7DA9380DF4D439578474F21AC919DB5F85E934_1659460941138_image.png
Protecting the main branch
So far, we’ve shown how to set up your dev environment and how to configure packages for improving your app and developer experience. In this section, we’ll look at what steps we can take to ensure that code is not pushed to the master branch directly.
One way you can do it locally is by using the pre-commit hook.
#!/usr/bin/env sh
. "$(dirname -- "$0")/_/husky.sh"

npm run lint
branch="$(git rev-parse --abbrev-ref HEAD)"

if [ "$branch" = "master" ]; then
  echo "It's advised to not commit directly to master branch"
  exit 1
fi
If you try to commit your changes, your terminal will display the following error.

https://paper-attachments.dropbox.com/s_AE8E461A5FA54C422D1B251EFF7DA9380DF4D439578474F21AC919DB5F85E934_1659619720565_image.png
The issue with this approach is that git hooks can be bypassed by using the --no-verify option. So if you run git commit -m "some changes" --no-verify, your changes will be committed on the branch.
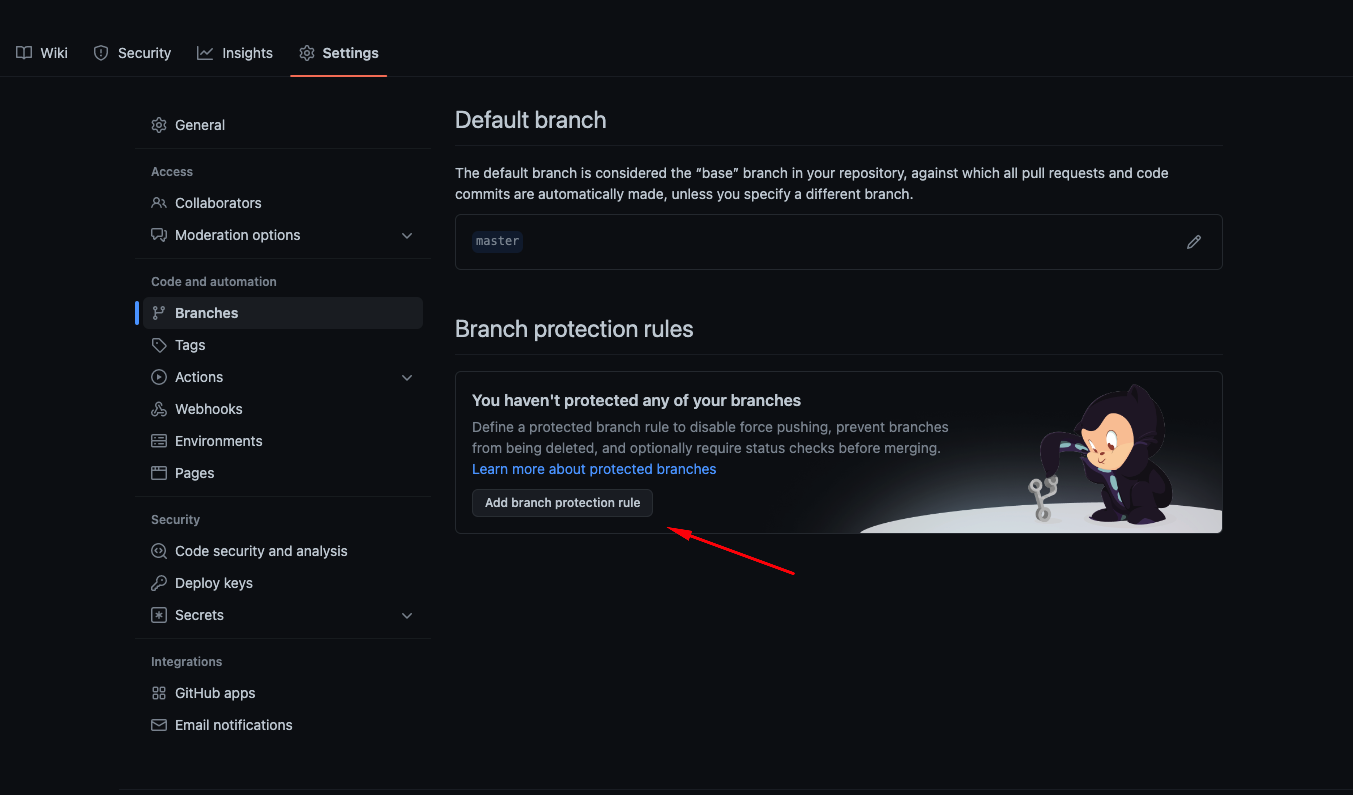
For full-proof protection, it's recommended to add branch protection rules in the remote repo's settings. Go to the settings section of the repository and click on the “Add branch protection rule” button.
https://paper-attachments.dropbox.com/s_AE8E461A5FA54C422D1B251EFF7DA9380DF4D439578474F21AC919DB5F85E934_1659620156474_image.png
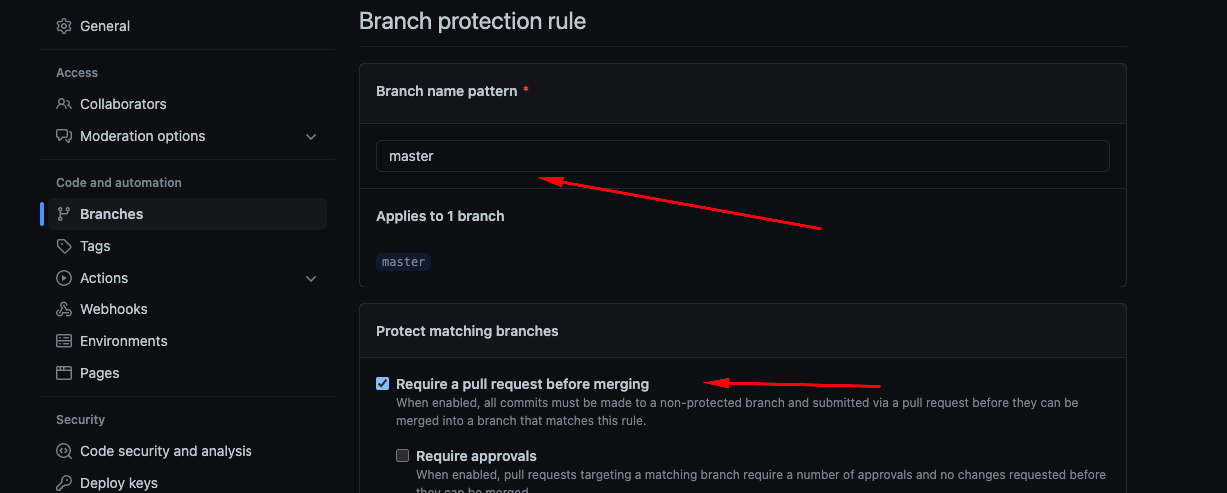
Add the branch name to which the rules should be applied and then select the restriction rules.
https://paper-attachments.dropbox.com/s_AE8E461A5FA54C422D1B251EFF7DA9380DF4D439578474F21AC919DB5F85E934_1659620372324_image.png
The administrators of the repository are excluded from these rules. You can enforce administrator restrictions by selecting the "Include administrators" option.

https://paper-attachments.dropbox.com/s_AE8E461A5FA54C422D1B251EFF7DA9380DF4D439578474F21AC919DB5F85E934_1659620395670_image.png
If you try to push your changes now, Github will reject your updates.

https://paper-attachments.dropbox.com/s_AE8E461A5FA54C422D1B251EFF7DA9380DF4D439578474F21AC919DB5F85E934_1659620340976_image.png
Conclusion
By installing a code editor, linter, and formatter, you'll be well on your way to writing clean and consistent code. With so many choices available, it can be tough to know which ones to choose. But with a bit of research, you'll be able to find the perfect tools for your needs.
