Rate Limiting: A Practical Guide to Prevent Overuse

Rate limiting is a technique used to control the frequency of requests a client can make to a server over a specified period.
Rate limits are commonly used to prevent abuse. LinkedIn, for example, doesn’t want users opening 10k profiles within a few minutes, as it’s very likely that those users are scraping them.
If you have an API that is expensive (maybe it makes calls to OpenAI or Anthropic), rate limits can be a great way to prevent users from costing you too much (whether it’s for malicious reasons or just over-eager customers).
In this post, we’ll look at the different ways you can implement rate limiting for various scales.
The Naive Approach - Track Everything
Let’s pretend we are making a chat bot for our docs. We want users to be able to ask it questions… within reason.
A single user asking 10 questions in an hour? That’s likely just an eager customer.
A single user asking 100 questions in a minute? Something’s wrong. It could be a lot of things, but we probably don’t want to allow this.
The simplest rate limiting strategy has just two steps. The first is to store all the requests that you get. Here’s an example of that in a SQL table:
chat_requests_log:
| customer_id | request_id | created_at |
|---|---|---|
| 1 | 9d491272-0075-444b-bbf3-017fa6af4fae | 2025-02-10 10:15:00 |
| 1 | 0a668bd8-e9dc-4ff5-a9bc-e9d3db7fef65 | 2025-02-10 10:15:13 |
| 1 | 9c5ef1b1-356e-4701-b389-5e8e589bf8a7 | 2025-02-10 11:11:43 |
| 4 | 67fc29b3-b059-462f-97d0-2933d6070130 | 2025-02-10 11:45:37 |
| 1 | c9709b2e-ac98-4b49-a2fc-2349ed5b967a | 2025-02-10 12:10:21 |
When a new request comes in, we can see their usage within the last minute with this SQL query:
SELECT COUNT(*) AS requests_in_last_minute
  FROM chat_requests_log
 WHERE created_at >= NOW() - INTERVAL '1 minute'
   AND customer_id = 1;
Based on the result, we can decide to allow the request or not.
Caveats with this approach
This approach is straightforward to implement, easy to customize, and provides a nice audit log. However, there are some caveats:
- Race Conditions: If a user submits 100 simultaneous requests, it’s hard to guarantee how many will be logged before you check the count. This can lead to incorrect rate-limiting decisions.
- Performance: At higher scales, storing every request can be costly. You also need to choose a data store that can handle potentially high volumes of writes. Or, alternatively, only use this approach if the scale is low.
- Locking: One partial fix for race conditions is to serialize requests for each customer (e.g., using a lock), but that can hurt performance.
At lower scales, this can work well—just keep an eye on concurrency and data growth.
Slightly Better - Storing a Counter per Window of Time
Our last approach was incredibly flexible—it could tell you the exact number of requests in any arbitrary time range. That’s often more than we really need, and it also means storing a lot of data.
A simpler alternative is to bucket requests into discrete windows—commonly one-minute buckets. Instead of storing every request, we keep a single counter for each user per minute.
How it Looks (Postgres example)
Here’s one way you might do it in Postgres, keeping a table that stores a counter for each (customer_id, minute):
CREATE TABLE IF NOT EXISTS chat_requests_per_minute (
  customer_id INT,
  window_start TIMESTAMP,
  request_count INT DEFAULT 0,
  PRIMARY KEY (customer_id, window_start)
);
Whenever a request comes in, add one to the count for that window:
INSERT INTO chat_requests_per_minute (customer_id, window_start, request_count)
VALUES (:customer_id, date_trunc('minute', NOW()), 1)
ON CONFLICT (customer_id, window_start)
DO UPDATE SET request_count = chat_requests_per_minute.request_count + 1;
Then you can check:
SELECT request_count
  FROM chat_requests_per_minute
 WHERE customer_id = :customer_id
   AND window_start = date_trunc('minute', NOW());
If request_count is above some threshold (e.g., 50 requests/minute), reject the request.
In production, many teams prefer using something like Redis / Valkey for this kind of counting. Redis can do atomic increments in memory, which is usually faster and simpler for rate-limiting counters.
Caveat: Minute Boundaries
If your threshold is 50 requests per minute, consider how people can slip in just under the wire at the end of one minute and the start of the next. You might see bursts that technically don’t violate the limit, but still feel like they happen too fast. That’s the main downside of fixed-window approaches—you get odd edge cases around boundaries.
The “Leaky Bucket” Approach
A more continuous approach is often called the “leaky bucket” algorithm. Instead of tracking usage in fixed windows, you keep a running count of current usage and reduce it steadily over time.
Let’s walk through a small, concrete example:
- Setup:
- Let’s say each user is allowed to make 1 request per second.
- We keep track of:
current_usage(how many requests they’re currently using).last_update(the last time we adjusted the usage).
- Initial State:
current_usage = 0last_update = 10:00:00
- First Request at 10:00:05:
- Check how much time has passed since
last_update(5 seconds). - We reduce
current_usagebased on how fast we let requests “drip out” (in our case, that’s 1 request per second). - In 5 seconds, we would reduce usage by 5 (but
current_usagecan’t go below zero, so it stays at 0). current_usageis then incremented by 1 (for the new request).current_usageis now 1, which is below our limit of 5.- Update
last_updateto 10:00:05.
- Check how much time has passed since
- Second Request at 10:00:06:
- Time passed = 1 second since
last_update. - We reduce
current_usageby 1, from 1 down to 0. - Then we increment it by 1 for the new request, so
current_usageis back to 1. last_update= 10:00:06.
- Time passed = 1 second since
- Five Quick Requests at 10:00:07:
- We suddenly get 5 requests in the same second at 10:00:07.
- Time passed = 1 second since last update. So we can reduce
current_usageby 1 again:current_usagegoes from 1 down to 0.
- Now for each of the 5 requests, we increment
current_usageby 1, bumpingcurrent_usageto 5. current_usageis at our limit (5). We still allow all of them because we never went above 5 in that moment.last_update= 10:00:07.
- Another Request at 10:00:07 (same second):
- No time passed (0 seconds) since
last_update. - We reduce usage by 0 (because 0 seconds have passed).
- Then we increment usage by 1 → that would take us to 6.
- Since
current_usagewould be 6, which is above the limit of 5, we reject this request.
- No time passed (0 seconds) since
In real code, you’d store current_usage and last_update for each user (or IP, or organization). Each new request triggers an update. If the updated current_usage is over the limit, you reject the request; otherwise, you accept it.
The advantage is that you don’t store every request or even a bucket per minute. You just store two values (plus a rate at which usage drains). This “smooths out” traffic: a few requests spaced out over time won’t trigger a rate limit, but a sudden burst likely will.
Quick Plug: PropelAuth API Keys have built-in rate limiting
If you don’t want to deal with any of this, at PropelAuth, we have an API Key offering that has built-in rate limits. You configure a UI like this:
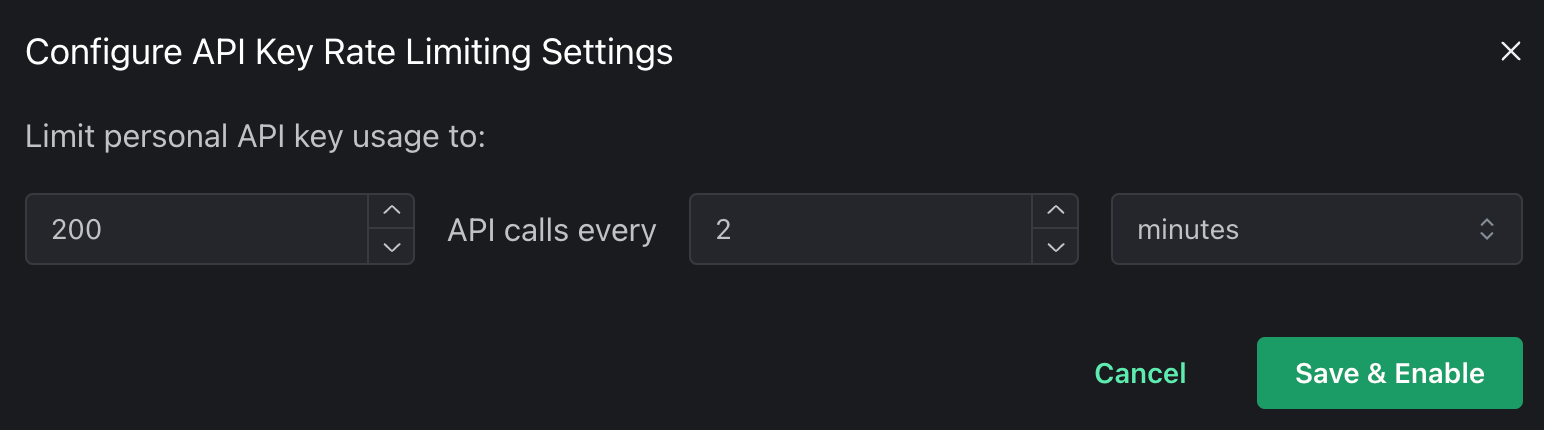
and that’s it! Your APIs will be protected with whatever configuration you set.
Tuning Your Rate Limits
One of the most challenging parts of rate limiting is choosing what limits to put in place.
If you choose a long window (e.g. 1k requests over an hour), then users that exceed the rate limit may need to wait for a long time before they can use the API again. If you set too short of a limit (e.g. 100 requests every second), then you might not be protecting much at all.
You should always start by looking at historical data - both for what you are trying to prevent and what your legitimate customers did.
There are then two schools of thought:
- Set it high and gradually lower it - This can be helpful to avoid disrupting any real users, but you may still be open to some abuse.
- Set it low and gradually raise it - This can be helpful for preventing abuse, but you may be disrupting some valid usage. Unfortunately, you may be disrupting your biggest advocates as well.
Whichever you choose, having accurate metrics will be really helpful as you tune it.
Summary
And that’s it for the basics of rate limiting. Whether you store every request, bucket them by minute, or maintain a running usage count, you’ll have a solid way to protect your API from abuse and unexpected costs.
As always, test thoroughly in your own environment, watch for edge cases, and be prepared to tweak your limits over time. Good luck out there, and happy rate limiting!